


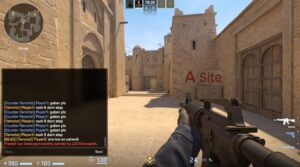



Whether you’re nailing a clutch in Counter-Strike 2 or showcasing your skills in any Steam or non-Steam game, this recording tool is engineered for top performance. Here’s everything you need to know to start using Steam Game Recording and make the most of this powerful feature.
Steam Game Recording Overview
Steam Game Recording is designed to work seamlessly across all Steam games and even non-Steam games, making it versatile for any gamer. It’s also fully compatible with the Steam Deck, allowing you to capture gameplay on the go. The feature minimizes CPU usage by leveraging the dedicated video encoding hardware of your AMD or Nvidia GPU, ensuring that your gaming performance remains unaffected. Benchmarks by Mr. Maxum show negligible performance differences between Steam Game Recording and popular tools like ShadowPlay.
How to Enable Steam Game Recording
To start using Steam Game Recording, you’ll need to enable it in the Steam settings:
Open Steam Settings
: Go to Steam and click on
Settings
.
Join Beta Participation
: Navigate to the
Interface
tab, select
Beta Participation
, and choose the Steam Game Recording option.
Restart Steam
: When prompted, restart Steam to apply the changes.
Once Steam restarts, you’ll find the
Game Recording
tab in your settings.
The Ultimate CS2 FPS Boost and Optimization Guide
Steam Game Recording Modes
Steam Game Recording offers two modes to suit different needs:
1. Record in Background
This mode automatically begins recording when you start playing a game, ensuring you never miss an epic moment. You can set the maximum recording duration, and once that limit is reached, the oldest footage will be overwritten by new gameplay. You can adjust the recording quality and storage location to suit your preferences.
Set Recording Duration
: Adjust the time (e.g., 1 hour or 2 hours).
Quality Settings
: Choose from different quality levels, which will affect the file size. For example, recording at high quality (12 MB/s) will use about 11 GB for 120 minutes of gameplay.
2. Record on Demand
This mode lets you control when to start and stop recording with a hotkey. Unlike background recording, this mode only captures gameplay when you decide, making it ideal for specific moments you want to highlight.
Hotkeys
: Use
Ctrl + F11
to start and stop recording.
Quality Settings
: Similar to background recording, you can adjust the recording quality but without worrying about recording length since it only records when you command it.
Saving and Managing Recordings
Recorded clips are automatically saved in a designated folder within your Steam directory:
Default Location
: The
Game Recordings
folder is created within your Steam directory, but you can customize the location if needed.
Managing Files
: Easily manage your recordings by navigating to
View
>
New Recordings and Screenshots
in the Steam menu. From here, you can view, edit, share, or delete your clips.
Customizing and Sharing Clips
Steam Game Recording also allows for extensive customization and sharing options:
Markers and Screenshots
: Use
Ctrl + F12
to add timeline markers or take screenshots during recording.
Sharing Clips
: You can share your clips directly from Steam, whether it’s exporting the file, copying it to the clipboard, or sending it to another device like your phone or Steam Deck.
Recording Non-Steam Games
Steam Game Recording isn’t limited to Steam games. You can record gameplay from non-Steam games by adding them to your Steam library:
Add Non-Steam Game
: Go to
Library
, scroll to the bottom, and click
Add a Game
>
Add a Non-Steam Game
.
Enable Steam Overlay
: Ensure the Steam overlay is enabled for the game to use the recording feature.
By following these steps, you can capture and share your most thrilling gaming moments with ease. Whether you’re using the background recording for continuous capture or the on-demand feature for precise control, Steam Game Recording is a powerful tool every gamer should try.
